Installing Fuego
This page describes the steps to install Fuego on your Linux machine. It includes detailed descriptions of the operations, for both users and developers.
Tip
If you are interested in a quick outline of steps, please see the Fuego Quickstart Guide instead.
Overview
The overview of the steps is:
Install pre-requisite software
Download the Fuego repository
Build your Fuego container
Start the container
Access the Jenkins interface
Install pre-requisite software
To retrieve the Fuego software and create the Docker image for it, you need to have git and Docker installed on your system.
On Ubuntu, try the following commands:
$ sudo apt-get install git
$ sudo apt-get install docker.io
These commands may be different for other distributions of Linux (such as Fedora, RedHat, CentOS, Mint, etc.)
Overview of remaining steps
Steps 2 through 5 of the installation can be performed with the following Linux commands:
$ git clone https://bitbucket.org/fuegotest/fuego.git
$ cd fuego
$ ./install.sh
$ ./start.sh
$ firefox http://localhost:8090/fuego
These steps and commands will be described in the sections that follow.
Install the Fuego repositories
The Fuego system is contained in 2 git repositories. One repository is
called fuego and the other is called fuego-core. The
fuego-core repository is installed inside the fuego directory, at
the top level of that repository’s directory structure. This is done
automatically during the install of Fuego. You do not need to clone the
fuego-core repository manually yourself.
The reason to have two repositories is that they hold different pieces of the Fuego system, and this allows for them to be upgraded independently of each other.
The repositories are hosted on bitbucket.org, under
the the fuegotest account.
Fuego repository
The fuego repository has the code and files used to build the
Fuego docker container. It also has the fuego-ro directory, which
has board definition files, various configuration files,
miscellaneous scripts, and other items which are used by Fuego
for container management or other purposes.
Fuego-core repository
The fuego-core repository has the code which implements the
core of the Fuego test execution engine, as well as the pre-packaged
tests included with the system. This includes the overlay generator,
the results parser, the Fuego shell function library, the directory
of tests, and the main Fuego command line tool ftc.
Downloading the repository
You can use git clone to download the main Fuego repository, like
so:
$ git clone https://bitbucket.org/fuegotest/fuego.git
$ cd fuego
After downloading the repositories, switch to the fuego directory,
as shown in the example.
Note that these git commands will download the ‘master’ branch of the repository, which is the current main released version of Fuego.
Downloading a different branch
If you are experimenting with an unreleased version of Fuego in the ‘next’ branch, then please replace the ‘git clone’ command in the instructions above with these:
$ git clone -b next https://bitbucket.org/fuegotest/fuego.git
$ cd fuego
This uses -b next to indicate a different branch to check out during
the clone operation.
Create the Fuego container
The third step of the installation is to run install.sh to create the
Fuego docker container. While in the fuego directory,
run the script from the current directory, like so:
$ ./install.sh
install.sh uses Docker and the Dockerfile in the fuego directory
to create a Docker container with the Fuego Linux distribution.
This operation may take a long time. It takes about 45 minutes on my machine. This step assembles a nearly complete distribution of Linux, from binary packages obtained from the Internet.
This step requires Internet access. You need to make sure that you have proxy access to the Internet if you are behind a corporate firewall.
Please see the section “Alternative Installation Configuratons” below
for other arguments to install.sh, or for alternative installation
scripts.
Fuego Linux distribution
The Fuego Linux distribution is a distribution of Linux based on Debian Linux, with many additional packages and tools installed. These additional packages and tools are required for aspects of Fuego operation, and to support host-side processes and services needed by the tests included with Fuego.
For example, the Fuego distribution includes:
the Jenkins continuous integration server
the
netperfserver, for testing network performance.the
ttccommand, which is a tool for board farm managementthe python
jenkinsmodule, for interacting with Fuego’s Jenkins instanceand many other tools, programs and modules used by Fuego and its tests
Fuego commands execute inside the Fuego docker container, and Fuego operations initiate in the container, but may access hardware (such as USB ports, networking, or serial ports) that are outside the container.
Configuring for ‘privileged’ hardware access
In many configurations, Fuego can perform its operations using only network operations. However, depending on the configuration of your boards, or your lab hardware, and the relationship between your host and target computers used for testing, you may need to access other hardware on your host machine.
To do that, you can create a ‘privileged’ Fuego container, using
the --priv options with install.sh:
$ ./install.sh --priv
Customizing the privileged container
Note that using --priv causes install.sh to use a different
container creation script. Normally (in the non –priv case),
install.sh uses fuego-host-scripts/docker-create-container.sh.
When --priv is used, Fuego uses
fuego-host-scripts/docker-create-usb-privileged-container.sh.
This latter script (docker-create-usb-privileged-container.sh) can
be edited, before running install.sh, to change the set of hardware
devices that the Docker container will have privileged access to.
This is done by adding more bind mount options to the docker create
command inside this script. Explaining exactly how to do this is
outside the scope of this documentation. Please see documentation and
online resources for the Docker system for information about this.
- The script currently creates bind mounts for:
/dev/bus/usb- USB ports, and newly created ports/dev/ttyACM0- serial port 0/dev/ttyACM1- serial port 1/dev/serial- general serial ports, and newly created ports
If you experience problems with Fuego accessing hardware on your host
system, you may need to build the Fuego docker container using
additional bind mounts that are specific to your configuration. Do so
by editing docker-create-used-privileged-container.sh, removing the
old container, and re-running ./install.sh --priv to build a new
container with the desired privileges.
Using an different container name
By default, install.sh creates a Docker image called fuego and a
Docker container called fuego-container. There are some situations
where it is desirable to use different names. For example, having
different container names is useful for Fuego self-testing. It can
also used to do A/B testing when migrating from one release of Fuego
to the next.
You can provide a different name for the Fuego image and container, by
supplying one on the command line for install.sh, like so:
$ ./install.sh my-fuego
This would create a Docker image named my-fuego and a Docker
container named my-fuego-container
Start the Fuego container
To start the Fuego docker container, use the start.sh script.
$ ./start.sh
Using a different container name
By default, start.sh will start the container named fuego-container
(which is the default Fuego docker container name). However, if you
created a different container name, you can specify the name
on the command line, like so:
$ ./start.sh my-fuego-container
When you run the start.sh, the terminal where the script
is run will be placed at a shell prompt inside the Docker container.
The session will be logged in as the root user inside the container.
The container will run until you exit this top-level shell.
Therefore, you should leave it (the shell and the terminal that your
ran start.sh from) running for the duration of your testing.
Access the Fuego Jenkins web interface
Fuego includes a version of Jenkins and a set of plugins as part of
its system. Jenkins is running inside the Fuego docker container. By
default the Fuego Jenkins interface runs on port 8090, with an URL
path /fuego.
Here is an example showing use of firefox to access the Jenkins interface with Fuego
$ firefox http://localhost:8090/fuego
To access the Fuego interface you can use any browser - not just Firefox.
In your browser, you should see a screen similar to the following:
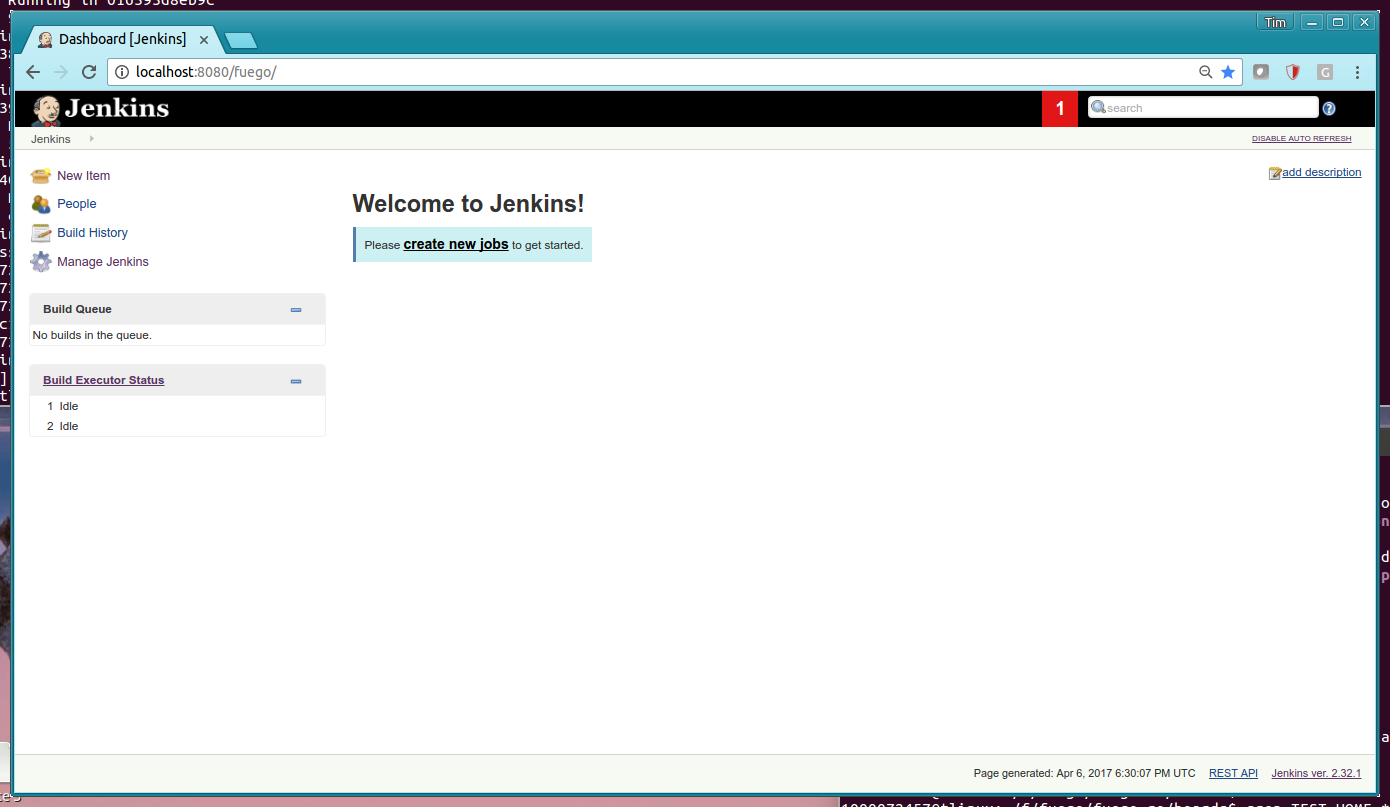
Note that this web interface is available from any machine that has access to your host machine via the network. This means that test operations and test results are available to anyone with access to your machine. You can configure Jenkins with different security to avoid this.
Access the Fuego docker command line
For some Fuego operations, it is handy to use the command line (shell
prompt) inside the Docker container. In particular, parts of the
remaining setup of your Fuego system involve running the ftc command
line tool.
Some ftc commands can be run outside the container, but other require
that you execute the command inside the container.
To start another shell prompt inside the currently running Fuego docker
container, you can use the script fuegosh. This helper script is
located at: fuego/fuego-ro/scripts/fuegosh. You may find it
convenient to copy this script to a bin directory on your system
(either /usr/local/bin or ~/bin) that is already in your PATH.
If you run fuegosh, it will place you at a shell prompt inside the
Fuego docker container, like so:
$ fuegosh
root@hostname:/#
Remaining steps
Fuego is now installed and ready for test operations. However, some steps remain in order to use it with your hardware. You need to:
Add one or more hardware boards (board definition files)
Add a toolchain
Populate the Jenkins interface with test jobs
These steps are described in subsequent sections of this documentation.
Alternative installation configurations
The default installation of Fuego installs the entire Fuego system, including Jenkins and the Fuego core, into a Docker container running on a host system, which Jenkins running on port 8090. However, it is possible to install Fuego in other configurations.
- The configuration alternatives that are supported are:
Install using a different TCP/IP port for Jenkins
Install without the Jenkins server
Install directly to your host (not inside a container)
With a different Jenkins TCP/IP port
By default the Fuego uses TCP/IP port 8090, but this can be changed to
another port. This can be used to avoid a conflict with a service
already using port 8090 on your host machine, or so that multiple
instances of Fuego can be run simultaneously.
To use a different port than 8090 for Jenkins, specify it after the
image name on the command line when you run install.sh. Note that this
means that you must specify a Docker image name in order to specify a
non-default port. For example:
$ ./install.sh fuego 7777
This would install Fuego, with an Docker image name of fuego, a
Docker container name of fuego-container, and with Jenkins
configured to run on port 7777
Without Jenkins
Some Fuego users have their own front-ends or back-ends, and don’t
need to use the Jenkins CI server to control Fuego tests, or visualize
Fuego test results. install.sh supports the option ‘–nojenkins’
which produces a Docker container without the Jenkins server. This
reduces the overhead of the Docker container by quite a bit, for those
users.
Inside the Docker container, the Fuego core is still available. Boards, toolchains, and tests are configured normally, but the ‘ftc’ command line tool is used to execute tests. There is no need to use any of the ‘ftc’ functions to manage nodes, jobs or views in the Jenkins system. ‘ftc’ is used to directly execute tests using ‘ftc run-test’, and results can be queried using ‘ftc list-runs’ and ‘ftc gen-report’.
When using Fuego with a different results visualization backend, the user will use ‘ftc put-run’ to send the test result data to the configured back end.
Without a container
Usually, for security and test reproducibility reasons, Fuego is executed inside a Docker container on your host machine. That is, the default installation of Fuego will create a Docker container using all the software that is needed for Fuego’s tests. However, in some configurations it is desirable to execute Fuego directly on a host machine (not inside a Docker container). A user may have a dedicated machine, or they may want to avoid the overhead of running a Docker container.
A separate install script, called install-debian.sh can be used in
place of install.sh to install the Fuego system onto a Debian-based
Linux distribution.
Please note that installing without a container is not advised unless you know exactly what you are doing. In this configuration, Fuego will not be able to manage host-side test dependencies for you correctly.
Please note also that executing without a container presents a possible security risk for your host. Fuego tests can run arbitrary bash instruction sequences as part of their execution. So there is a danger when running tests from unknown third parties that they will execute something on your test host that breaches the security, or that inadvertently damages you filesystem or data.
However, despite these drawbacks, there are test scenarios (such as installing Fuego directly to a target board), where this configuration makes sense.